Introduction
An LED video wall is infrastructure — not a peripheral. For corporate boardrooms, houses of worship, broadcast studios, and event venues, a display going dark mid-presentation isn't just inconvenient. It's a credibility problem — and often a costly one.
Even professionally installed displays develop faults over time. Component wear, power fluctuations, environmental stress, and configuration drift all take their toll. The good news: most failures are predictable, and most can be fixed without replacing the entire wall.
This guide walks through the most common LED display failure types, their root causes, a systematic diagnostic process, and a practical framework for deciding when repair makes more sense than full replacement.
Key Takeaways
- Most LED display failures trace to a handful of root causes: power supply failure, loose data connections, failed driver ICs, or environmental stress
- Diagnosing symptoms before touching hardware prevents repeat failures and wasted parts
- Flickering, color distortion, and signal errors are often fixable at the component level — no full replacement needed
- Knowing when to repair vs. replace protects budget and reduces downtime
- Routine preventive maintenance costs far less than emergency repairs or unplanned panel replacements
Common LED Display Issues and What They Look Like
Most LED display failures follow recognizable symptom patterns. Matching the symptom to the right cause is the first step toward the right fix. Skip that step, and repairs tend to fail the first time.
Dead or Dark Pixels/Modules
Symptom: Individual pixels, clusters, or entire modules appear completely black regardless of what content is playing.
Likely causes:
- Failed LED chip or open circuit in bond wires
- Faulty driver IC controlling that pixel or module group
- Damaged PCB trace cutting power or data to that section
- Loss of DC power feed to the module
Flickering or Intermittent Display
Symptom: Rapid blinking, unstable image, or sections cutting in and out — sometimes triggered by nearby load changes or equipment.
Likely causes:
- Loose or corroded data/power connectors
- Failing power supply under load
- Signal interference from unshielded or overly long cables
- Overheating components causing thermal shutdown cycles
Per Unilumin's troubleshooting documentation, a flickering cabinet typically points to an internal cable issue, receiving card output failure, or an incorrect receiving card program — which narrows the diagnostic path quickly.
Vertical or Horizontal Lines on Screen
Symptom: Solid or flickering lines running consistently across the display. Vertical lines usually indicate data transmission issues; horizontal lines often point to the panel itself.
Likely causes:
- Damaged ribbon cables between modules
- Failed driver ICs along a data row or column
- Cracked PCB traces
- Faulty controller card output on a specific channel
Daktronics' service documentation confirms that a vertical blank line or missing color that follows a module when swapped identifies logic chip failure — and Daktronics recommends module replacement to resolve it.
Color Distortion or Uneven Brightness
Symptom: Sections displaying incorrect colors (one channel dominant or missing), or visible brightness inconsistency across panels.
Likely causes:
- Driver IC failure on a specific R, G, or B channel
- Calibration data corruption
- Extreme temperature exposure degrading LED efficiency
- A loose module power plug or flat cable (Absen's K V3 manual lists this as a direct cause of chromatic aberration)
Blank Screen or No Display
Symptom: The entire display is dark despite active power indicators, or it receives no signal at all.
Likely causes:
- Complete PSU failure or blown fuse
- Catastrophic controller card failure
- Major data bus interruption
- Source input or sending card issue
This is the most severe failure category. Start from the power supply and work outward, and don't assume the controller is at fault before confirming DC voltage is reaching the modules.
Why LED Displays Fail: Root Causes
LED display failures aren't random. They follow patterns tied to operational decisions, environmental conditions, and maintenance habits. Understanding the cause prevents the same failure from recurring after the repair.
The Four Primary Root Causes
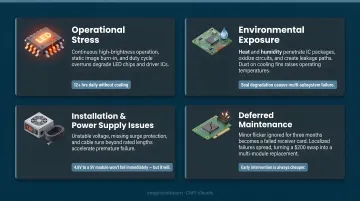
- Operational stress — Continuous high-brightness operation, static image burn-in, and running displays beyond rated duty cycles accelerate LED chip and driver IC degradation. Unilumin notes that exceeding specified temperature ranges significantly shortens component life, a real concern for displays running 12+ hours daily without adequate cooling.
- Environmental exposure — Heat and humidity are the two biggest threats. Moisture penetrates IC packages, oxidizes circuits, and creates leakage paths. Dust accumulates on cooling fins, raising operating temperatures. For outdoor displays, seal degradation and moisture ingress can cause catastrophic failure across multiple subsystems simultaneously.
- Installation and power supply issues — Unstable voltage, missing surge protection, incorrect signal routing, and cable runs beyond recommended lengths all contribute to premature failure. A power supply delivering 4.8V to modules rated for 5V won't fail immediately, but it will fail sooner than it should.
- Deferred maintenance — Minor flicker ignored for three months becomes a failed receiver card. Slight color inconsistency becomes widespread calibration drift. Localized failures spread to adjacent modules, turning a $200 component swap into a multi-module replacement job.
Early intervention is always cheaper. The cost difference between catching a loose connector during a quarterly inspection versus replacing three modules because that connector arced internally is substantial.
How to Diagnose and Fix LED Display Issues (Step-by-Step)
Attempting a repair without confirming the root cause wastes parts, risks additional damage, and almost guarantees a repeat failure. This process isolates the fault before anything gets replaced.
Step 1: Perform a Visual and Physical Inspection
Start with what you can see without any tools.
- Check for cracked or broken modules, scorched areas on the cabinet, and water ingress marks
- Look for visibly disconnected data or power cables
- With the display powered off, gently reseat all connectors
- Confirm all modules are fully and evenly seated in their mounting frames
- Inspect cooling fans and vents — dust blockage is a common cause of thermal failures that look like power or data issues
Many "complex" failures resolve at this step. A connector that worked loose over months of thermal cycling can take out an entire data chain.
Step 2: Test Power Supply Outputs
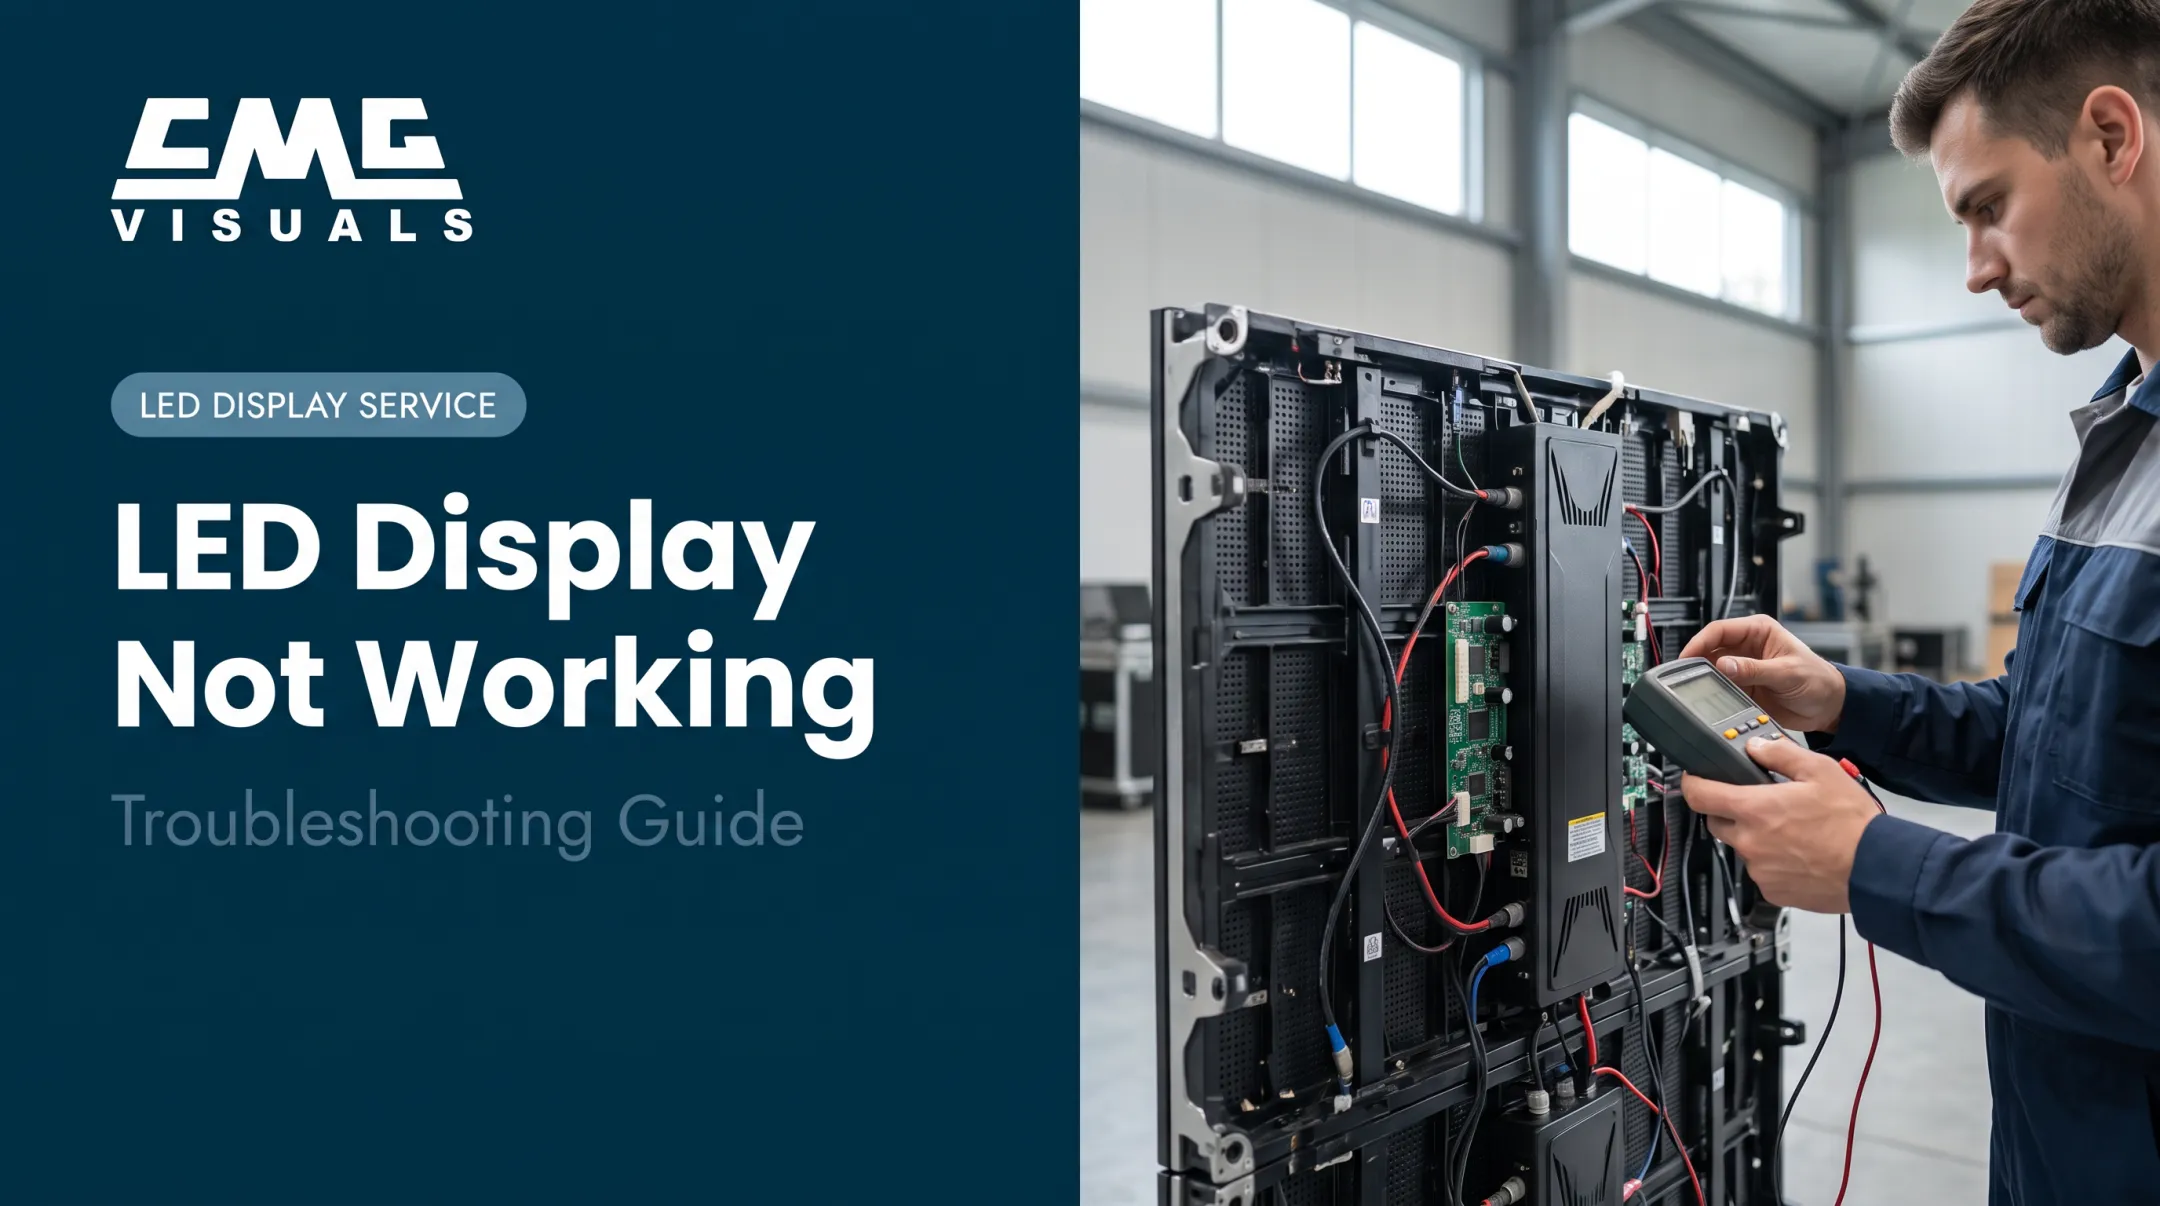
Use a multimeter to measure voltage at the PSU outputs and at module input points. A low or dead reading on the DC supply line typically confirms PSU failure.
Key checks:
- Measure voltage at PSU output terminals
- Measure at the module input — voltage drop across connectors or traces can indicate a wiring fault rather than a failed PSU
- If one PSU feeds multiple modules and only those modules are dark, replace the PSU before investigating further
Before powering back up after any PSU work, check for shorts between supply rails and ground. Absen's service documentation requires this step explicitly, and it applies to any cabinet — not just Absen hardware.
Step 3: Isolate the Data and Signal Path
Swap suspect cables, receiver cards, or modules with confirmed working spares. If the fault moves with the component, that component is faulty. If it stays in the same location, the fault is in the cabinet, wiring, or upstream signal.
Also check:
- Sending card and control software are functioning correctly
- Configuration file matches the current screen layout
- Firmware on receiver cards is current and uncorrupted
NovaLCT (for NovaStar-based systems) covers this entire diagnostic stack — screen mapping, calibration coefficients, firmware updates, LED error detection, and Ethernet bit-error detection. CMG Visuals' NovaStar-certified technicians work with this software across multi-panel configurations, and it's the most efficient way to run signal path diagnostics on NovaStar hardware.
Step 4: Replace the Faulty Component
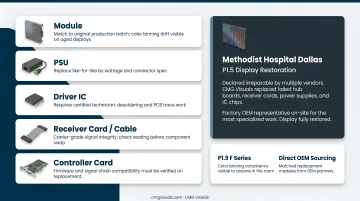
Professional LED video walls are modular by design. Most repairs involve replacing only the specific failed component — a module, PSU, driver IC, cable, or controller card — not the entire display.
Match replacement components exactly to original specifications. A module from a different production batch can create visible brightness or color inconsistencies across the wall — particularly on displays that have been in service for several years. CMG Visuals sources matched replacement modules directly from OEM partners, which matters on displays like the P1.9 F Series where color binning consistency is visible to anyone in the room.
For component-level repairs involving driver IC desoldering or PCB trace work, this work requires certified technicians with proper tooling. To illustrate what that looks like in practice: at Methodist Hospital Dallas, CMG Visuals restored a P1.5 display that multiple other vendors had declared irreparable — the repair involved replacing failed hub boards, receiver cards, power supplies, and IC chips, with a factory OEM representative on-site for the most specialized work.
Step 5: Calibrate and Validate the Repair
After any module replacement or component swap, run a full-screen color calibration using your control software. Skipping this step leaves visible brightness or color seams where the new component meets the existing display.
Post-repair validation checklist:
- Run full-screen brightness and color calibration
- Test with solid color patterns (red, green, blue, white, black)
- Test with gradient content and motion video
- Run under normal and peak load conditions for several hours
- Confirm the fault does not return
Repair vs. Replace: How to Decide
The decision depends on four factors: the nature and extent of the fault, the display's age and overall condition, repair cost relative to replacement, and how critical the application is.
| Scenario | Repair | Replace |
|---|---|---|
| Isolated module or PSU failure, display under 5 years old | Yes — component swap is cost-effective | Not necessary |
| Multiple simultaneous failures across independent subsystems | Only if failures share one subsystem | Recommended — indicates end-of-life degradation |
| Physical damage (cracked cabinet, water damage) | If limited to 1-2 modules with intact structure | If structural integrity or controller is compromised |
| 7+ years old, recurring failures, outdated controller infrastructure | Only if repair cost is well below 50% of new display cost | Strongly recommended |
CMG Visuals' own approach leans toward repair first. Their documented threshold for recommending replacement comes down to two triggers: parts obsolescence (when a manufacturer has ceased support and components can't be sourced) and structural failure that makes repair uneconomical. The St. Luke's Episcopal Church project is a clear example — the original manufacturer had gone out of business, parts were unavailable, and replacement was the only viable path.
When replacement is the right call, newer hardware often delivers tangible upgrades over what it replaces. The Harris County Sports Authority project used a ribbon-free P1.9 architecture, removing one of the most common failure points in legacy walls, and included 10% spare modules for future hot-swap serviceability.
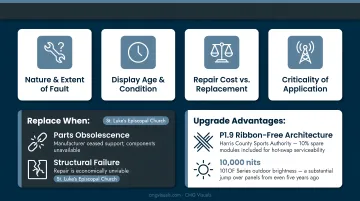
Brightness is another area where newer panels separate themselves. CMG Visuals' outdoor 101OF Series reaches 10,000 nits — a substantial jump over what was typical even five years ago.
Preventive Maintenance to Avoid Future Repairs
Preventive maintenance is straightforward and far cheaper than emergency repair. The goal is catching small issues before they cascade.
Monthly physical inspections:
- Check all cable connections and module seating
- Visually scan for early signs of pixel degradation or color inconsistency
- Inspect mounting hardware for looseness
- Check cooling fans and vents for dust accumulation
Environmental controls:
- Maintain adequate airflow behind and around panels
- Keep operating temperature and humidity within manufacturer-specified ranges
- Most commercial cabinets specify an operating range around -10°C to +40°C and 10–80% RH — confirm exact limits in your cabinet's manual
- Seal any gaps in outdoor cabinet enclosures before wet seasons
Power and firmware hygiene:
- Connect all displays to surge-protected, regulated power sources
- Schedule firmware and control software updates to prevent configuration drift
- Test UPS status regularly if installed
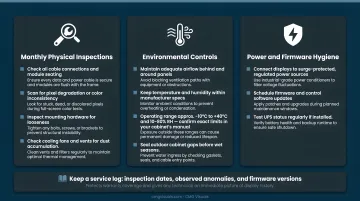
All three of these habits compound over time, but they only deliver full value when paired with documentation. Keep a service log that records inspection dates, observed anomalies, and firmware versions. It gives any technician — including CMG Visuals' team during a service call — an immediate picture of the display's history, and it protects warranty coverage by demonstrating consistent upkeep.
Frequently Asked Questions
How much does it cost to fix an LED screen?
Repair costs vary widely based on the fault type. A single module or PSU swap costs significantly less than controller card replacement or multi-panel restoration. Get a professional diagnosis before committing to a budget — isolated component failures are frequently mistaken for total system loss.
Can an LED display be repaired?
Yes. Most LED display issues resolve at the component level — module, PSU, driver IC, cables, or controller card — without replacing the full installation. CMG Visuals has restored displays that other vendors had written off as unrepairable.
Is it worth fixing an LED TV screen?
Consumer LED TVs and commercial LED video walls are different calculations. On a consumer TV, panel replacement often approaches the cost of a new unit. On a commercial video wall, component-level repair is almost always cost-effective. Get a professional assessment before committing to either path.
What causes an LED display to stop working?
The most common causes are a failed power supply, loose or damaged data cables, a faulty controller or receiver card, and overheating. Isolating the fault requires a systematic process: start with power, then trace the signal path, then test individual components.
How long do LED displays last before needing repair?
Quality commercial LED displays are rated for 50,000–100,000 hours of operation. Without preventive maintenance, first repairs typically appear within 3–5 years. Consistent upkeep, adequate cooling, and stable power can push that timeline considerably further.
Can I repair an LED display myself or do I need a technician?
Basic checks — cable reseating, power cycling, firmware reloads — can be handled by experienced AV staff. Component-level work involving PSU replacement, driver IC repairs, or calibration requires certified technicians; attempting these without proper tools risks voiding warranties and compounding the damage.